
If you are developing Visual Studio extensions for your users, sooner or later you would have a functionality where you want to let users to configure some values. The best way to provide configurable options to users. So in this blog post I will show you how you can integrate your extension to Options window of Visual Studio.
I will be giving a screenshots below of Visual Studio Options window created in Avanade Extensions for VS2013 – a Visual Studio extension created by me along with Tarun Arora. So to give you an idea, here is the screenshot which we will be going to create.
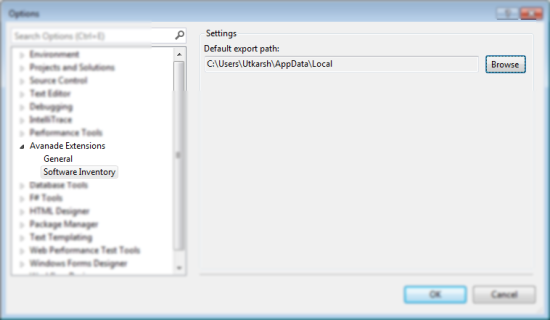
1. As you can see in the above screenshot, we are going to have two categories, General and Software Inventory. For Avanade Extensions we do not have any General options so we are using it as “About” box. On click of the category on the left, the UI is refreshed on the right hand side. The UI to display on the right, is created using classes which inherit DialogPage (Micorost.VisualStudio.Shell assembly). The DialogPage class provides the mechanism to create the custom dialog pages. Since we are going to create a custom UI (instead of default property sheet) as it is the most popular way of creating Options in Visual Studio and also because it gives more freedom to create a UI you want, for example UI with radio buttons or checkbox etc.
The DialogPage class provides a Window property which needs to be overridden to return the custom control to Visual Studio when user clicks on our category. However, it is not necessary to override this if you are not going to display custom UI and would like to stick to default implementation of Property Grid (there are many examples already on the web).
So lets first create two user controls, one when user clicks “General” and another one when he clicks “SoftwareInventory”.
Software Inventory User Control
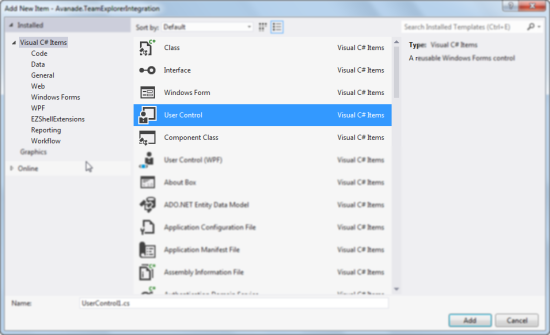
a. So Right click on the project, click Add –> New Item and select User Control (not UserControl (WPF)). You may need to import System.Windows.Forms assembly if not done already.
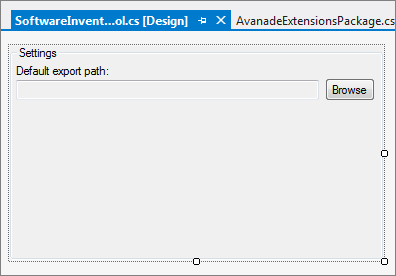
b. In this control I am allowing user to configure the default folder to export the report to. So we are going to add a label, textbox(to display path) and button to prompt the user to show the folder select dialog.
- I am creating a property ExportFolder to allow the to be set from DialogPage child class when user clicks OK button on the Visual Studio Options window. Also, this saves the path selected by the user.
public string ExportPath { get { return txtFolderPath.Text; } set { txtFolderPath.Text = value; } }
- Another property to reference the DialogPage class, which allows us to set the control property.
public SoftwareInventoryOptions OptionsPage { get; set; }
- Rest of the code is as below
private void btnBrowse_Click(object sender, EventArgs e) { DialogResult result = folderBrowserDialog.ShowDialog; if (result == DialogResult.OK) { txtFolderPath.Text = folderBrowserDialog.SelectedPath; } } // the control is called when user clicks on “Software Inventory” in the options window private void SoftwareInventoryOptionsControl_Load(object sender, EventArgs e) { //if Visual Studio returns empty for this property we are setting local appdata path if (string.IsNullOrEmpty(OptionsPage.ExportPath)) { OptionsPage.ExportPath = Environment.GetFolderPath(Environment.SpecialFolder.LocalApplicationData); } //by default set the textbox path to be users local appdata folder txtFolderPath.Text = OptionsPage.ExportPath; }
c. Now we need to create a new class and inherit the DialogPage class. So first create a class and insert the code below.
[ClassInterface(ClassInterfaceType.AutoDual)] [ComVisible(true)] [Guid(“FE594AA2-0C82-481A-99DE-E99343ECEA0B”)] public class SoftwareInventoryOptions: DialogPage { private SoftwareInventoryOptionsControl _optionsControl;
//We are letting Visual Studio know that this property value needs to be persisted
[DesignerSerializationVisibility(DesignerSerializationVisibility.Visible)] public string ExportPath { get; set; }
\[Browsable(false), DesignerSerializationVisibility(DesignerSerializationVisibility.Hidden)\]
protected override IWin32Window Window
{
get { _optionsControl = new SoftwareInventoryOptionsControl; _optionsControl.Location = new Point(0, 0); _optionsControl.OptionsPage = this; _optionsControl.ExportPath = ExportPath;
return _optionsControl; } }
//When user clicks on Apply in Options window, get the path selected from control and set it to property of this class so //that Visual Studio saves it. protected override void OnApply(DialogPage.PageApplyEventArgs e) { if (e.ApplyBehavior == ApplyKind.Apply) { ExportPath = _optionsControl.ExportPath; } base.OnApply(e); } }
General Control
a. The steps are similar to above, but we are using General options as About window, so there are basically few label controls.
Registering options controls to Package
Now that necessary infrastructure is ready, we are going to let Visual Studio know that our package implements Options window. We also, letting Visual Studio maintain the persistence of the properties. This is done declaratively using two attributes.
[ProvideOptionPageAttribute(typeof(GeneralOptions), "AvanadeExtensions", "General", 110, 201, true)] [ProvideOptionPageAttribute(typeof(SoftwareInventoryOptions), "AvanadeExtensions", "SoftwareInventory", 110, 401, true)] [ProvideProfileAttribute(typeof(SoftwareInventoryOptions), "AvanadeExtensions", "SoftwareInventory", 110, 401, true, DescriptionResourceID = 402)] public sealed class AvanadeExtensionsPackage: Package { ... ... ... }
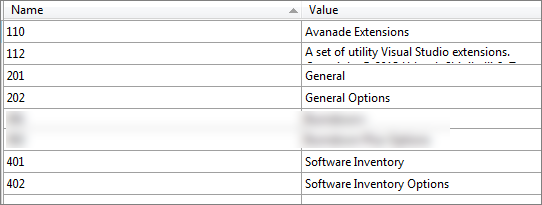
The first two ProvideOptionPageAttribute attributes convey to Visual Studio Shell that we are implementing two Options category. The first parameter tells which type the options window hosts. Next two parameters “AvanadeExtensions” and “General” are canonical names, used during reading of options window. Then next two parameters are localized resource ID’s which are defined in Resource file as below. These strings are used to display in the Options window.
Final parameter of ProvideOptionPageAttribute is true meaning Visual Studio Options can be accessed using Automation (DTE) object. This allows DTE object
Reading from options window
Finally, if you would like to access the values set in the options window, you can use GetDialogPage method. For demo, I have added a menu item under tools “Get Options Using GetDialogPage” on clicking it, I am getting the values from the Options window. Place the below code in Package.cs file.
private void MenuItemCallback(object sender, EventArgs e) { var optionsPage = GetDialogPage(typeof (CustomOptions)) as CustomOptions;
if (optionsPage!= null)
{
var pathSetInOptions = optionsPage.PathForVisualStudio; MessageBox.Show(pathSetInOptions); } }
I have also created a demo project which demonstrates the above. You can download the code from link below.