

If you work with XAML day in and day out then surely you will have your own tips/tricks for working inside of Visual Studio 2010. Here are mine. I hope that you find them useful.
Tip #1
When Double Clicking on a.XAML File go directly to the XAML View and collapse the Design split view.
I find it annoying how the design view opens up every time you double click on a.XAML file. I like to create my UI inside of Expression Blend instead of Visual Studio. For instance, I get the following screen when I double click on a.XAML file inside of WP7 Project inside of Visual Studio 2010.
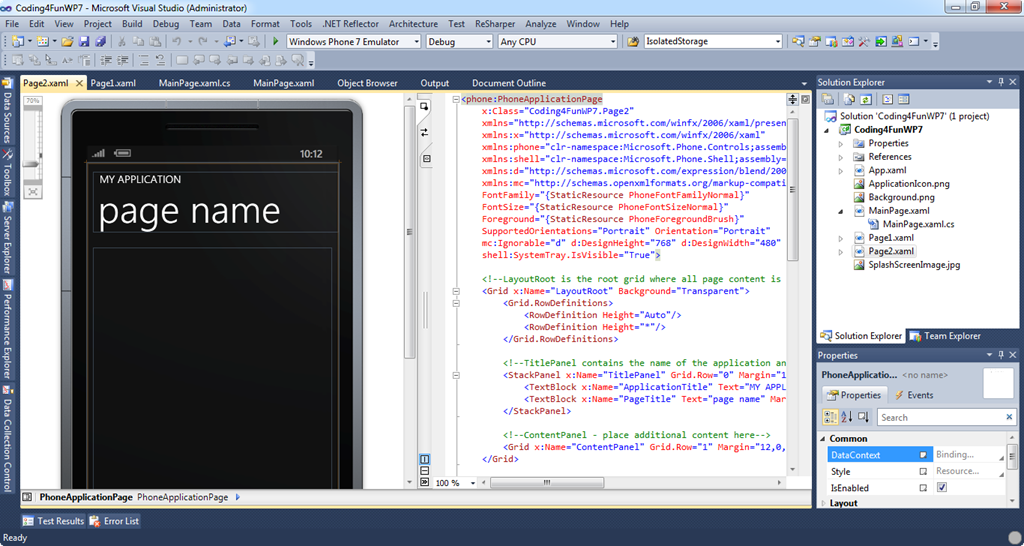
This is annoying because it takes time to render the design view and even load items from the toolbox. Let’s change this to where it just loads the XAML file and if we need to see the designer inside of Visual Studio then we can easily do so.
Inside of Visual Studio 2010… Go to Tools > Options > Text Editor > XAML > Miscellaneous and put a check in “Always open documents in full Xaml View”.
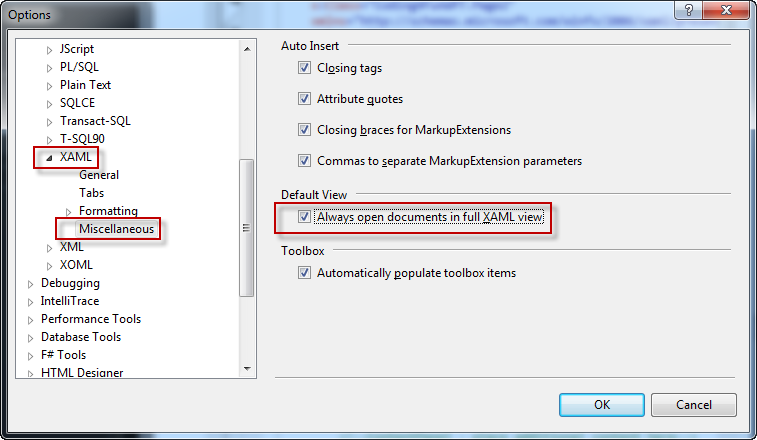
Now the next time you open a.XAML File in Visual Studio 2010 it will look like this:
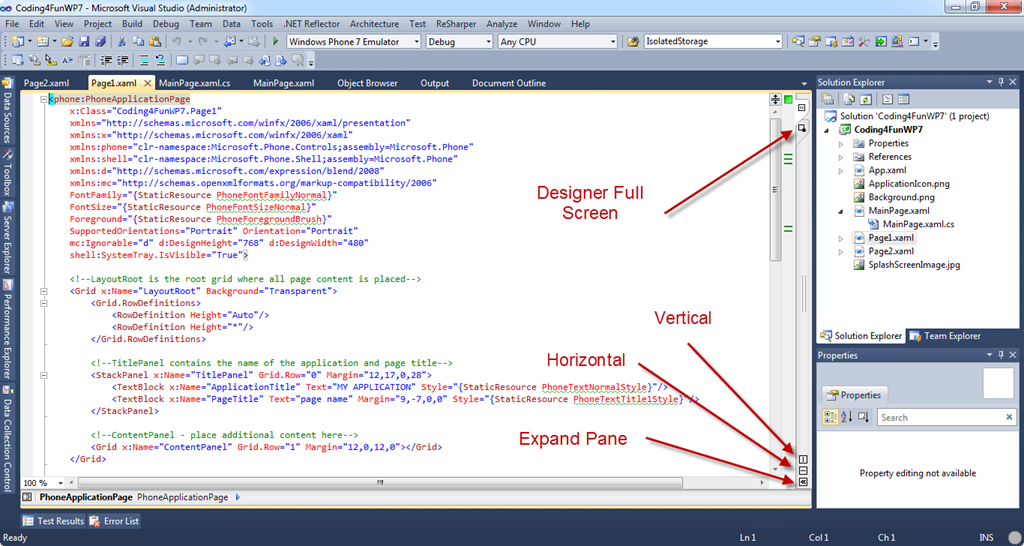
Much better in my opinion. You still have the option to switch back to the designer screens by clicking on the buttons listed above.
Tip #2
Improve readability of XAML inside of Visual Studio 2010.
Here is the default view of a XAML page inside of Visual Studio 2010. It is very annoying that you have to scroll to see all of the properties of the buttons. Even with that, the properties are spaced so close together that you look at each line for a few seconds in order to find the property that you want.
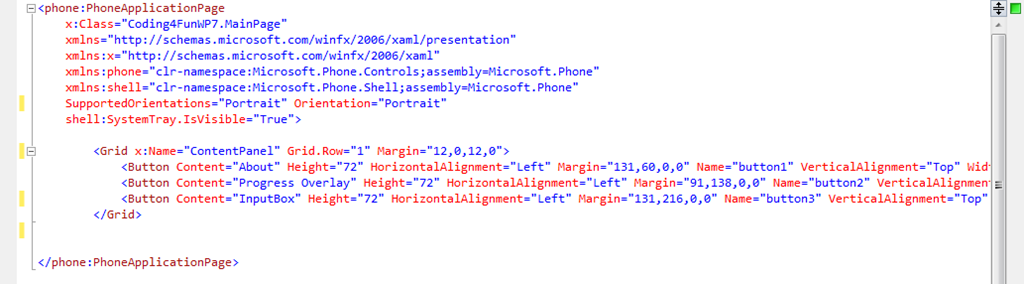
Let’s go ahead and fix that by going inside of Visual Studio 2010… Go to Tools > Options > Text Editor > XAML > Formatting > Spacing and finally check “Position each attribute on a separate line”.
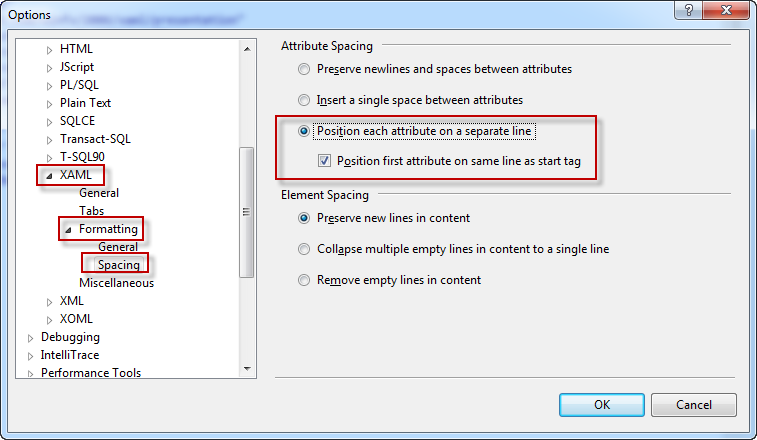
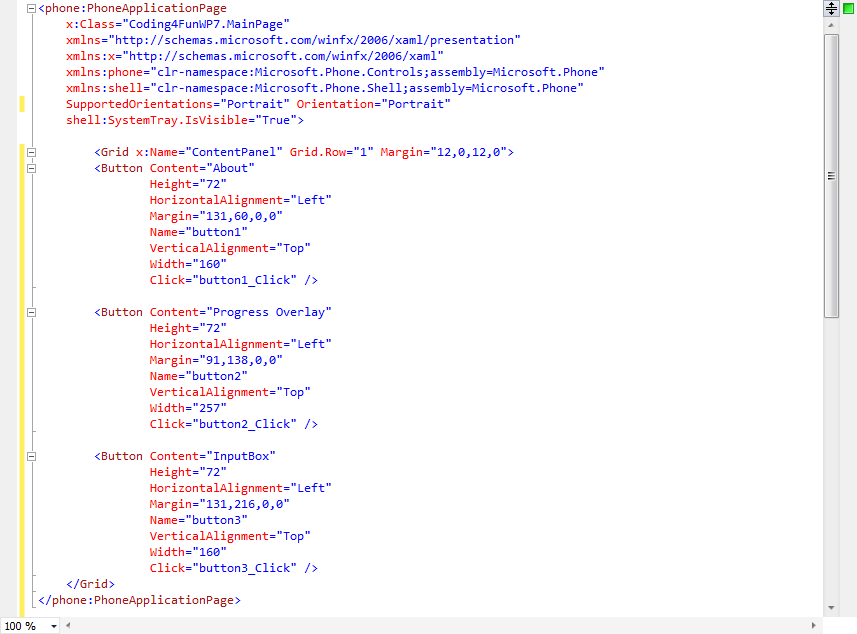
Now when you go add new controls, you will get the nice and neat formatting shown below. You can also adjust previous lines by pressing ctrl - e, d to format the document.
Tip #3
Adding Line Numbers to your XAML view in order to assist in bug tracking and documentation.
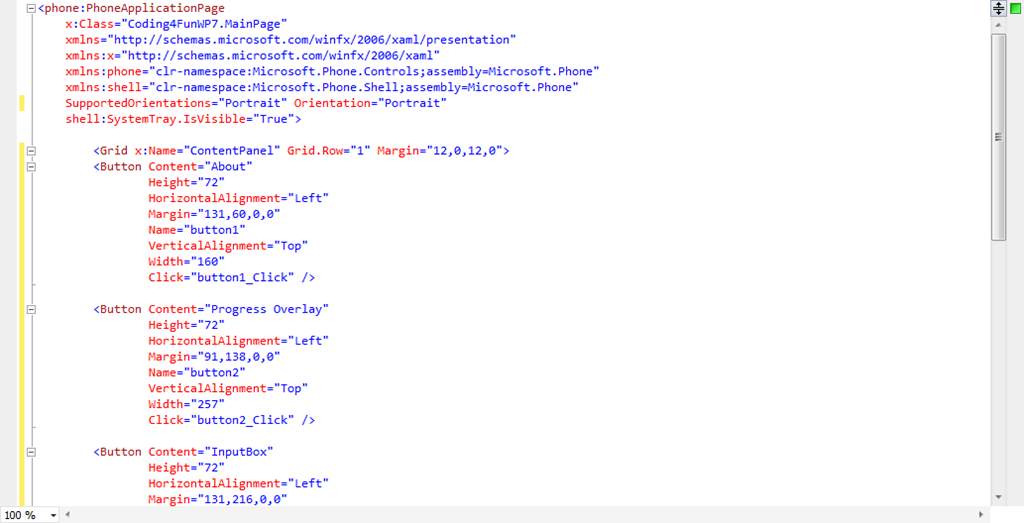
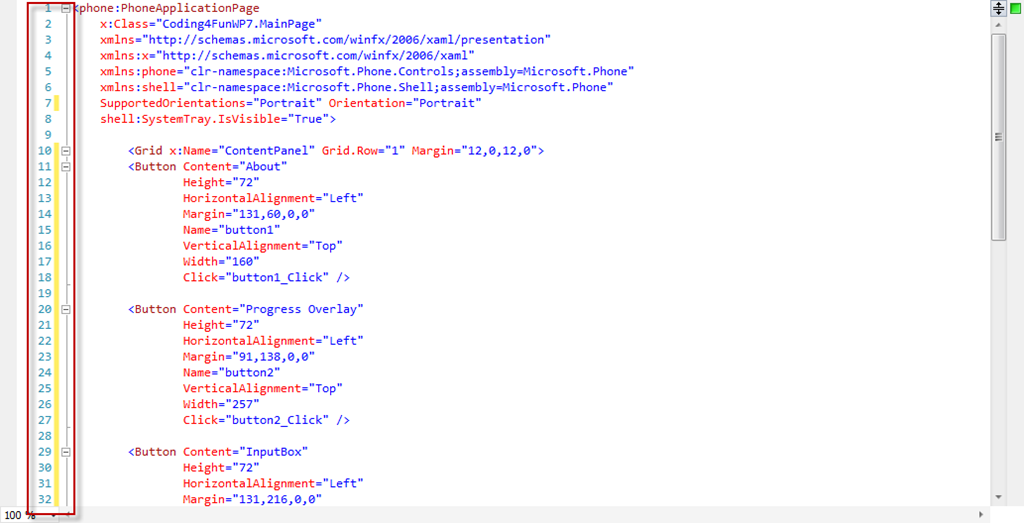
Here is the default view inside of Visual Studio 2010. Notice that none of the code has line numbers.
Let’s go ahead and fix that by going inside of Visual Studio 2010… Go to Tools > Options > Text Editor > XAML > General > Under Display make sure there is a check in “Line Numbers”.
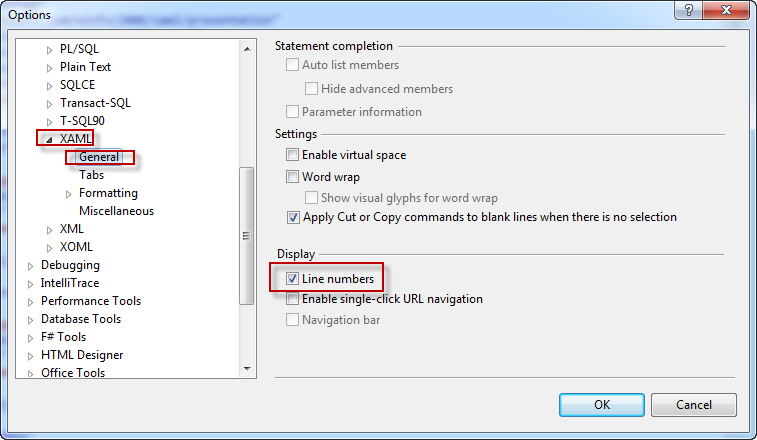
With a single checkbox, now you can have line numbers in XAML.
Tip #4
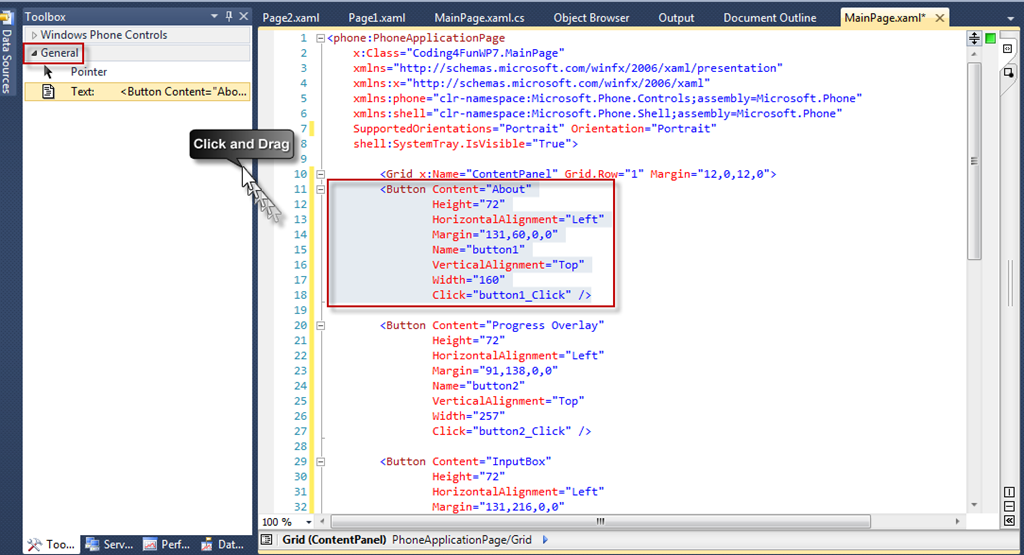
Storing XAML Code Snippets inside of Visual Studio 2010.
Once you have a XAML code snippet that you want to reuse you can easily keep it by dragging and dropping the code snippet into the “General” tab in the Visual Studio 2010 Toolbox as shown below. Now if you ever want to use that code snippet you can do so by dragging it back in to the XAML view.
That concludes my tips and tricks for working with XAML inside of Visual Studio 2010. I hope that you found something useful from this post and come back again for more Silverlight/WPF/WP7 information.
](http://feeds.feedburner.com/MichaelCrump) Subscribe to my feed