
If you build Silverlight Applications, chances are you have seen this screen before. I’m talking about the default “To view this content, please install…” Screen shown below.
The Default Installation Screen.

This is the screen that your users see when they first visit your site without Silverlight installed. It’s just plain ugly and most users do not know what it means. Take this example below by Netflix, they have alerted the user with a friendly: “You’re almost ready to watch…” Install Now. This screen makes the user eager to install Silverlight because they want to watch the movie. This is a perfect example of why you should spend time customizing this screen.

I snagged this image from Google images which pulled it off of Tim Heuer’s great site_._
We are going to build a screen that is stylish in about 15 minutes using the Sample Code Microsoft provided for us. To begin you are going to want to read the Silverlight Installation Experience White Paper and download the Sample Code.zip file.
Since you develop Silverlight Applications, you first need to disable the plug-in from your browser. I am using IE9 Beta at the moment and will show you how to disable it.
Click the Settings button first and then click on Manage add-ons:
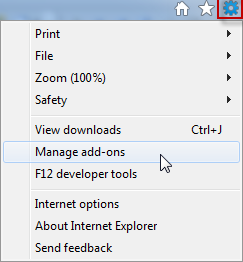
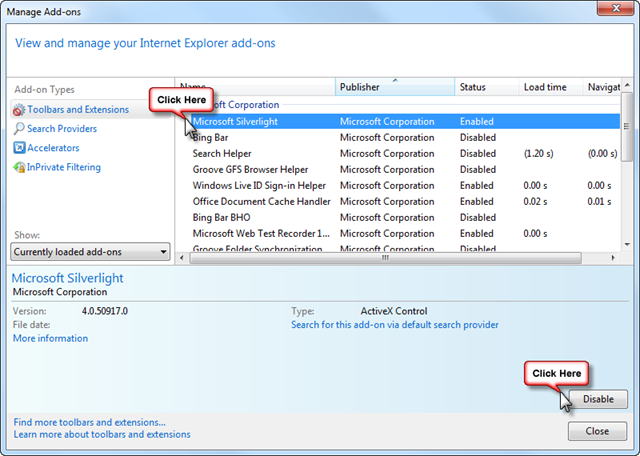
You will want to find Microsoft Silverlight and disable it like shown below:
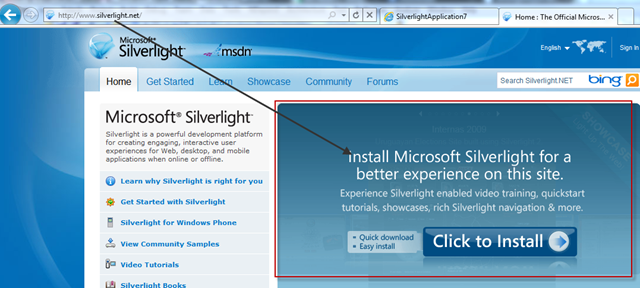
Now if you go to www.silverlight.net you should see the following screen:
Now that our browser thinks that Silverlight is not installed. It’s time to finish the job.
Extract the Installation Experience Sample Code to a folder and you will have the following directories:
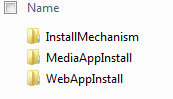
We are going to copy the css and images folder from the WebAppInstall Folder onto our clipboard to paste later: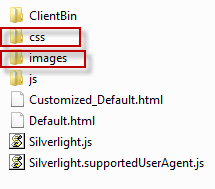
Now that the files are copied, we are going to paste them into our Silverlight Project’s Web Folder.
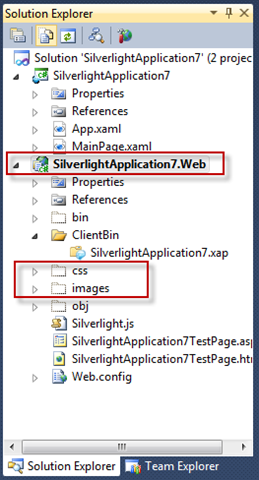
At this point, you will need to add the stylesheets and images reference to either your.aspx or.html file. We are going to add it to our.html file.
You can go ahead and add the template below to the inside of your form tag, paying special attention to the div classes we are creating:

Michael Crump is the developer of this fine demo.
He really enjoys building in Microsoft Silverlight and his hobbies include:
- Programming.NET
- WP7
- Film
- Family
 GET STARTED NOW!
Now, when you load your site, it will have the following theme: (minus the good looking guy in the picture)
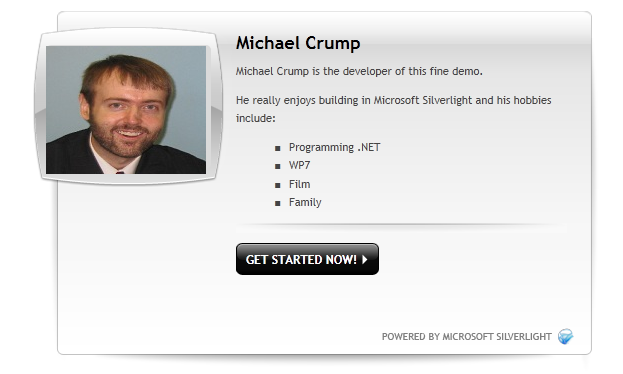
This was accomplished in about 15 minutes. You can look at the code above and see that this was easily accomplished. A demo can be found, but you will need to disable Silverlight in your add-on first. Full source can be found.
Full source is located below:
SilverlightApplication7 html, body { height: 100%; overflow: auto; } body { padding: 0; margin: 0; } #silverlightControlHost { height: 100%; text-align:center; }
Michael Crump is the developer of this fine demo.
He really enjoys building in Microsoft Silverlight and his hobbies include:
- Programming.NET
- WP7
- Film
- Family
GET STARTED NOW!
](http://feeds.feedburner.com/MichaelCrump) Subscribe to my feed