For those who are familiar with the VirtualPC, vmWare and VirtualBox environments will be quite irritated to find out, in Hyper-V, there is no direct way to share files from the Host machine to the Virtualized guest environment. This is a good thing from a CIO perspective because there’s excellent isolation for the virtualized environments this way, but for the developer junkies like us, this is an irritant, especially for those who have nuked their Windows 7 OS and installed Windows Server 2008 R2 for all the the SharePoint friendliness that it offers. Here’s a quick 5 minutes howto on Enabling Shared Folders and Internet Access for the Hyper-V images, for those who are still struggling with this.
Step 1: Add a Virtual Network Adapter to your Guest OS
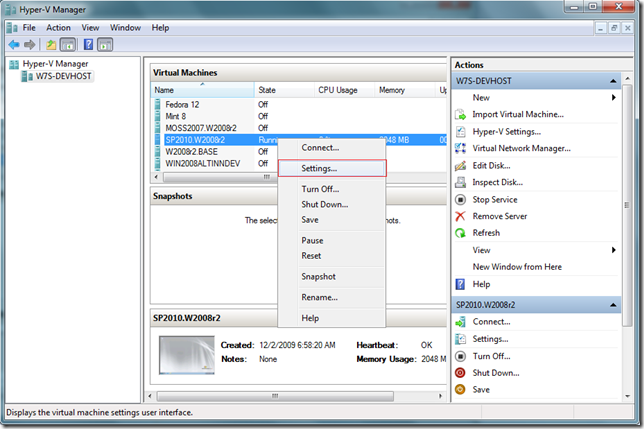
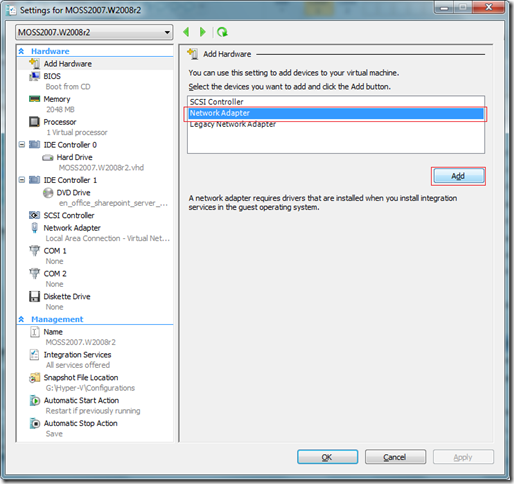
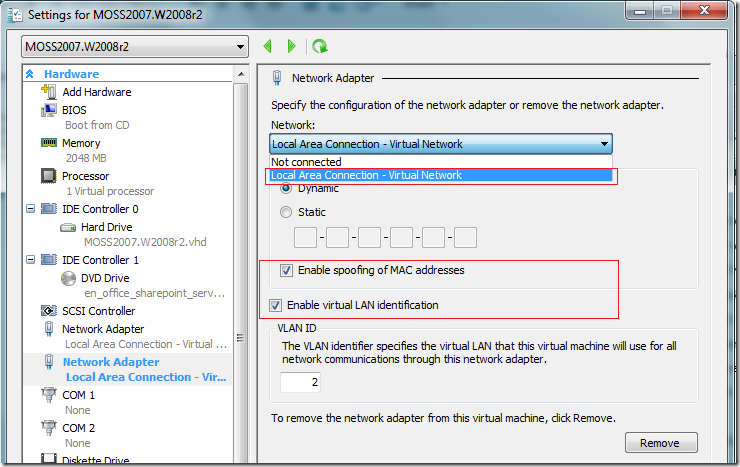
For this, shut down the guest machine, go to its settings and add a Virtual Network Adapter as given in the images below
Step 2: Enable Virtual Networking in Hyper-V
Setting this up is very easy.
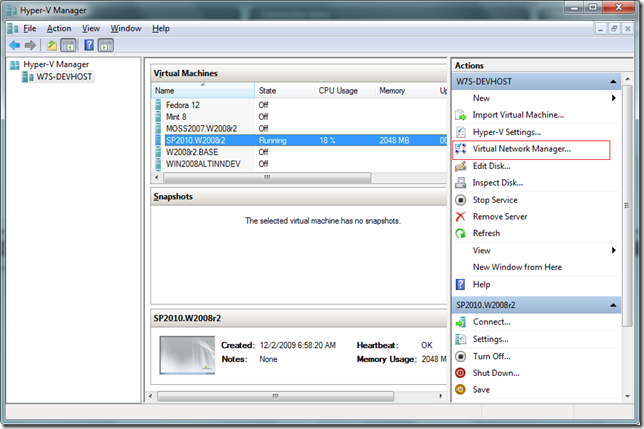
- In the Hyper-V Manager, under Actions (right panel), click the Virtual Network Manager.
- In the Virtual Network Manager in the Create virtual network panel, select Internal and click the Add button.
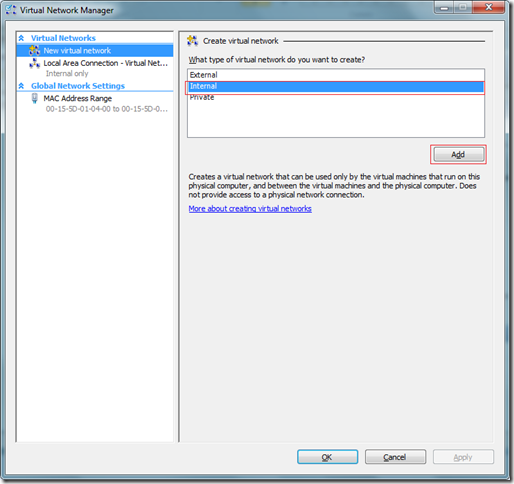
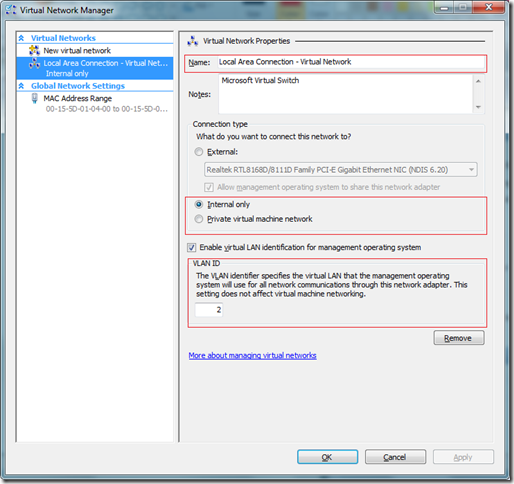
At this point if you open Control Panel\Network and Internet\Network Connections you will be able to see the new Network Adapter, Now name it to something meaningful other than Network Adapter X. Now you can add this network to each of your virtual machines, but at this point, unless you assign an IP address in each connection, you won’t be able to do much.
Step 3: Enable Internet Connection Sharing so that Guest OS’es also can connect to the internet.
To enable ICS follow these steps:
- Click on the network icon in the tray of your host machine and select Network and Sharing Center.
- From there click Manage network connections.
- Select the network adapter that you use to access the Internet. Right click it and select Properties.
- In the properties dialog select the Sharing tab.
- On this tab check the box that says “Allow other network users…” and then set the Home networking connection to be the network adapter that was created above (now you see why I said to rename it to something useful
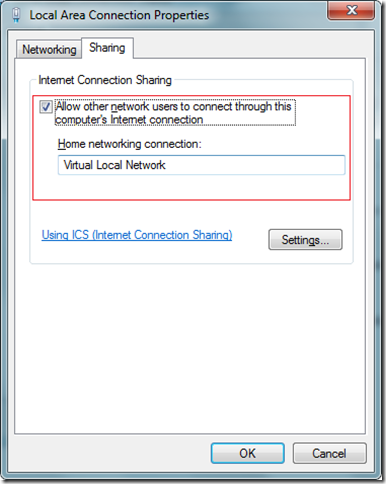
Now your virtual machines that have this network connection will automatically get an IP address and will be able to connect to the Internet (provided your internet connection is working).
Because each adapter also gets an automatic address you can now share files and folders between your host and your virtual machines which is important since you can’t just drag-and-drop files like you can with Virtual PC.
Step 4: Create a Shared Folder in the Host Machine and use it in the Guest machine.
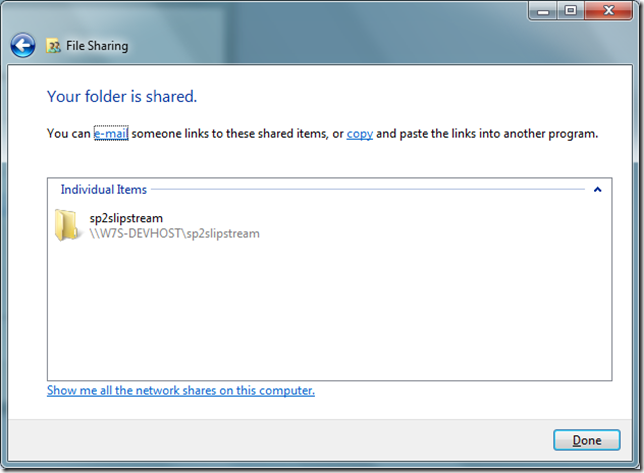
- Right click on the folder that you want to Share and select ‘Share with\Specific People’ and specify who all can access the share.
- Open the Guest OS from Hyper V
- Navigate to Start > Run and type in the Address of the Share (Or Map a Drive to the Share)
- Bingo! The Share opens!! 🙂
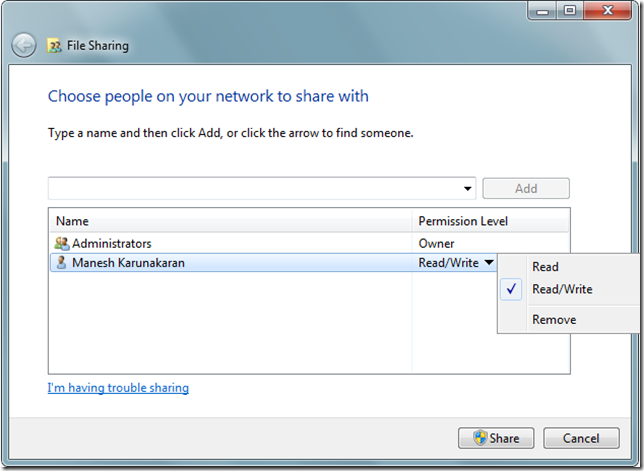
Now you can share as many files and folders as you want between the host and the guest, and you also have internet access inside the Virtual machines. Hope that helps.
Technorati Tags: Shared folder,Hyper-V,Share Files,Share files and folders between guest and host,Hyper-V Networking,Share Internet Access in Hyper-V,Internet,Files,Shared folders in Hyper-V,Copy files,Move files


